When it comes to revamping your living space, one often overlooked but incredibly transformative project is skim-coating a concrete floor. Skim coating is the secret weapon that can turn your drab and worn-out concrete surface into a sleek and polished masterpiece. In this comprehensive guide, we’ll delve into the world of skim-coating concrete floors, covering everything from its benefits to the step-by-step process and tips for achieving a flawless finish. Get ready to discover how you can elevate your interior spaces with this game-changing technique.
One of the primary benefits of skim coating is the creation of a smooth and level surface. It eliminates unevenness, cracks, and imperfections in your concrete floor, providing a perfect canvas for various flooring options.
Skim coating enhances the appearance of your concrete floor dramatically. You can choose from various finishes, such as polished concrete or decorative overlays, to achieve a stylish and modern look that complements your interior design.
Skim coatings create a protective layer that extends the life of your concrete floor. It’s resistant to stains, abrasions, and everyday wear and tear, making it an excellent choice for high-traffic areas.
Compared to tearing out and replacing a damaged concrete floor, skim coating is a cost-effective solution that can save you both time and money.
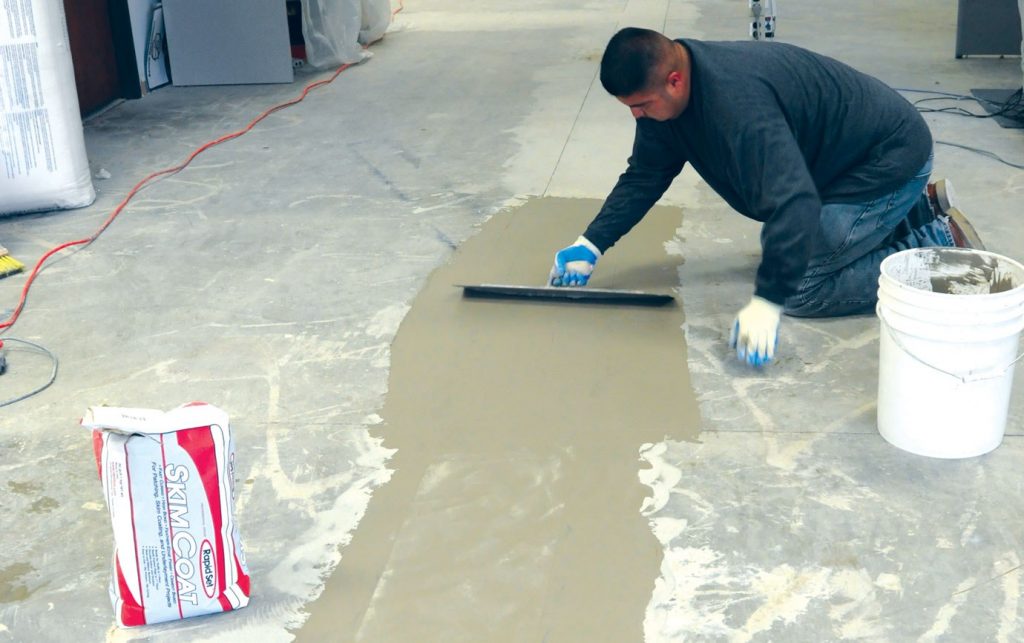
Now that you understand the benefits, let’s dive into the step-by-step process of skim coating your concrete floore.
Clean the Surface: Begin by thoroughly cleaning the concrete floor. Remove all dirt, dust, and debris using a broom and a vacuum cleaner. Repair Cracks and Holes: Fill any cracks or holes with a concrete patching compound. Allow it to dry according to the manufacturer’s instructions.
Apply a Bonding Agent: To ensure proper adhesion of the skim coat, apply a bonding agent to the entire surface. Follow the manufacturer’s guidelines for drying times.
Follow Instructions: Prepare the skim coat mixture according to the manufacturer’s instructions. Consistency is crucial; you want it to be thick but spreadable.
Start Skimming: Begin applying the skim coat using a trowel or a squeegee. Work in small sections, spreading the mixture evenly. Smooth It Out: After applying the skim coat, use a long-handled squeegee or a trowel to smooth and level the surface. This step requires patience and precision.
Allow to Dry: Let the skim coat dry for the recommended time, typically 24-48 hours. Avoid walking on it during this period. Sand the Surface: After it’s fully dry, lightly sand the surface to remove any imperfections and create a smooth finish.
Seal the Surface: Apply a concrete sealer to protect the surface and enhance its appearance. This step also makes it easier to clean and maintain.
In conclusion, skim coating a concrete floor can breathe new life into your space, providing a smooth, durable, and aesthetically pleasing surface. By following the step-by-step guide and these essential tips, you can transform your concrete floor into a flawless masterpiece that enhances the beauty and functionality of your home or business. Don’t hesitate to embark on this exciting project and unlock the potential of your interior spaces today.
