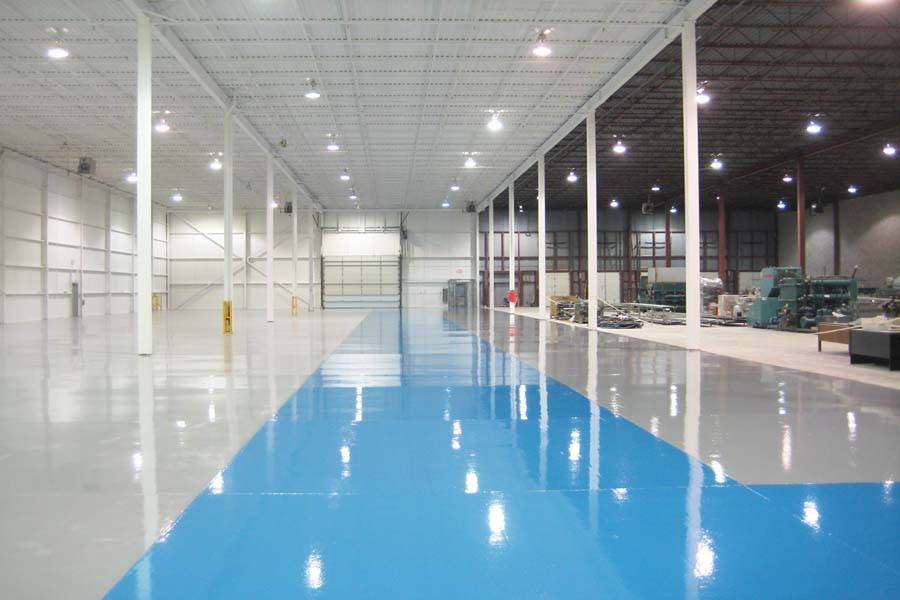
Putting concrete flooring in your garage is a great way to give it a new look and make it more useful. This project will change the way your garage looks and how you use it. Epoxy flooring not only looks better but also lasts longer, which is important in a garage, where things can get rough.
Putting concrete flooring in your garage requires careful planning, careful preparation, and careful application. From cleaning the surface and putting on base coats to putting on the final layer of epoxy, each step helps make a smooth and long-lasting finish.
In this complete guide, we’ll show you step-by-step How to Install Epoxy Flooring in a Garage. Whether you’re a do-it-yourselfer who’s ready to tackle the project yourself or you’re thinking about hiring a professional, knowing the process is key to getting a garage floor that not only looks great but can also stand up to the daily wear and tear of your garage.
What are the benefits of epoxy garage floors?
Epoxy gives your garage floor a professional look and makes it easy to clean because it repels oil stains, beads water, and wipes clean like a kitchen table. On a rainy day, an anti-slip ingredient helps you keep your balance, and color chips and custom paint colors hide any flaws in the concrete.
As you’ll see in the steps below, Xtreme Polishing Systems makes it easy to get the dirt off and put on the epoxy in just one weekend. When that’s done, the garage will be a place you’ll want to drive up to and show off.
How to Choose the Right Epoxy Flooring
Epoxy floor paints are hard, resin-based paints that come in two parts that you have to mix together before using. Epoxy glue comes in three forms: solid, solvent-based, and water-based.
Solid epoxy flooring: Solid epoxy flooring is the best form of epoxy. It doesn’t have any acids in it that dry up. These things are expensive and hard to work with because they get hard very quickly. This finish should be put on by a professional.
Solvent-based epoxy flooring: Solids make up 40–60% of solvent-based epoxies. They go deep into the concrete and stick well. There are many different colors of them. When putting the finish, you have to wear a respirator because the solvents are strong and could be dangerous. You’ll also have to make sure the garage has enough air flow and keep people and animals away from the area.
Water-base epoxy flooring: Like solvent-based epoxies, water-based epoxies have between 40 and 60% solids. This type of epoxy is good because it doesn’t have any dangerous chemical fumes. Most home shops and hardware stores sell these epoxy finishes. They are becoming more and more popular as alternatives to solvent-based finishes.
There are also pre-colored and metallic epoxy finishes that can be used to make stylish floors both inside and outside. Some epoxy flooring systems come with colored flakes that are spread out when the second layer of covering is put on, making a pattern of spots.
How to Epoxy Your Garage Floor in 9 Easy Steps
Putting an epoxy covering on your garage floor can make it look nice and last for a long time. This step-by-step guide will show you how to put epoxy flooring in nine easy steps. Whether you want to improve the look of your garage, protect it from wear and tear, or just give it a new look, these steps will help you get a beautiful and durable epoxy-coated garage floor.
Prepping to Epoxy the Garage Floor
The most important part of putting concrete on a garage floor is getting it ready well. Without it, the cement might not stick well to your concrete floors, causing you to waste time and money in the long run. It’s always worth the time and effort to do a DIY job right the first time if you want it to turn out well. So, you won’t have to worry about having to do it again soon.
Follow the steps in this section to get ready, but also check the directions that came with the epoxy kit you bought.
Step 1: Clear The Garage Space
The first thing you should do is get everything out of your shed. You don’t want to risk damaging your things, so choose a day with nice weather. If you have a lot of storage in your garage, you might want to rent a storage pod or find a short place to put your things.
Step 2: Make Sure You Don’t Have a Moisture Problem
You might want to skip this step, but don’t! If your concrete floors are getting too wet, it could be a sign of a bigger problem. If your garage floor is damp, it might be hard for the glue to stick to it.
Put a big square piece of plastic or visqueen on the garage floor and secure it with duct tape to check for water. Spread the material out tightly and make sure the duct tape covers every edge.
Give the plastic about 24 hours to sit. When the time is up, look inside the plastic for any signs of water or mist. If the area is dry, you can move on to the next step. If there is wetness, stop here and call a concrete repair expert in your area to find out what’s going on.
Step 3: Remove Dirt and Dust
Before you put cement on your garage floor, you should first clean it well. Use a broom, a cleaner, or a pressure washer to get rid of all the dirt, dust, and debris. Your epoxy covering will stick well and have a smooth finish if the surface is clean.
Step 4: Degrease Your Garage Floor
Use a cleaner to get rid of any grease or oil left on the floor so that the epoxy will stick well to the concrete. Follow the instructions on the degreaser mix that you bought for this step.
Even though you can treat grease and oil marks spot by spot, it’s usually better to take the time to clean the whole garage floor so you don’t miss a spot.
Make sure your garage floor has been thoroughly rinsed with a pressure washer before going on to the next step. If you don’t have a pressure washer, you should be able to use a standard garden hose.
Any extra water should be squeegeed toward your garage doors so it can flow out onto the road.
Step 5: Make Sure the Floor Is Completely Clear
Before you move on to putting on the cement, give your garage floor one more look to make sure it is completely clean. It might be a good idea to sweep or clean one last time.
Let’s get to the good part now.
Step 6 :Etch the Entire Surface
You might be asking, “What on earth is etching?” When you etch, you use acid to take off the top layer of your garage floor. Since you’re going to be working with acid, you might want to wear gloves to keep your skin from getting hurt.
This is another important step to make sure the glue goes on right and stays in place. Usually, the etching solution is a powder that you mix with water. Most cement kits for garage floors already include an etching solution.
Again, we suggest that you follow the directions that come with your glue kit. But if you want a general idea of how to cut concrete, it usually involves three steps:
- Use the etching fluid to cover the whole garage floor.
- Give it 20–30 minutes to sit.
- Use a hose or power washer to remove all of the solution from the floor.
It’s important to make sure the floor is fully dry before moving on. To do this, the garage floor might need to sit for 24 hours. During this time, try not to walk through the garage too much so you don’t bring more dirt and dust into the house.
Step 7: Fill in cracks and sand down stains
For the epoxy to stick well, you need to sand away any paint or glue that is still stuck to the concrete. Use a patch kit to fix the cracks. Follow the directions on the kit for how long to let the patchwork dry, and sand it if you need to make it smoother.
When you’re done sanding, don’t forget to clean up any dust.
Step 8: Mix the Epoxy
For this step, you will need a plastic jar and a stirrer. The best thing to use to mix the solution is a simple bucket made of plastic. Just make sure it’s big enough for the paint brush you’re going to use.
With kits, the epoxy solution usually comes in two parts: a glue and a hardener/activator. Epoxy can only be used for about two hours before it hardens and can’t be used anymore, so you might want to mix epoxy in smaller amounts.
Follow the directions on the epoxy container for the right measures and steps.
Step 9: Apply the Epoxy
After mixing the epoxy solution well, start by painting the area around the walls and floor boards with a brush. Using a paint brush gives you more control so you can get all the epoxy into those tight spots without getting it on the walls.
When you’re done painting the outside of your garage, put a roller brush on a long painter’s pole and use it to cover the rest.
You can add color flakes to your floor if you want to make it more interesting. It also helps draw attention away from any cracks, stains, or other flaws that are still there. Usually, an epoxy kit comes with color flakes or paint chips.
Always follow the directions that come with your glue kit. But as a general rule, it’s best to paint epoxy on small areas at a time. Before moving on to the next part, sprinkle color flakes evenly over the whole section before the epoxy dries.
Most of the time, the pros of doing an epoxy floor yourself far trump the cons. But if you’re not sure you can do this job on your own, you might want to think about hiring a professional with experience in epoxy flooring.
5 Tips for Applying Epoxy to Garage Floor
Prep Is Key: Fix any cracks in your garage floor and clean it well to get it ready. Any flaws can change how the end result turns out.
Ventilate: To reduce fumes while working with epoxy, make sure there is good airflow. Open the doors and windows, or use fans and masks.
Mix correctly: Follow the directions given by the manufacturer for how to mix epoxy components. A uniform finish depends on how well you mix.
Work quickly. Epoxy only works for a short time, so apply it quickly and carefully. Get ready with all your tools and materials.
Seal and protect: After applying the paint, you might want to add a clear topcoat for extra protection and to make the paint last longer. Proper drying time is very important, so stay off the floor for as long as instructed.